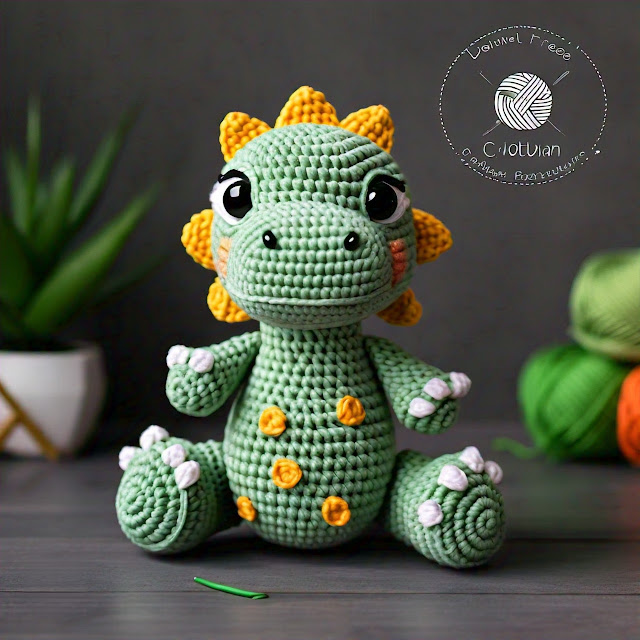
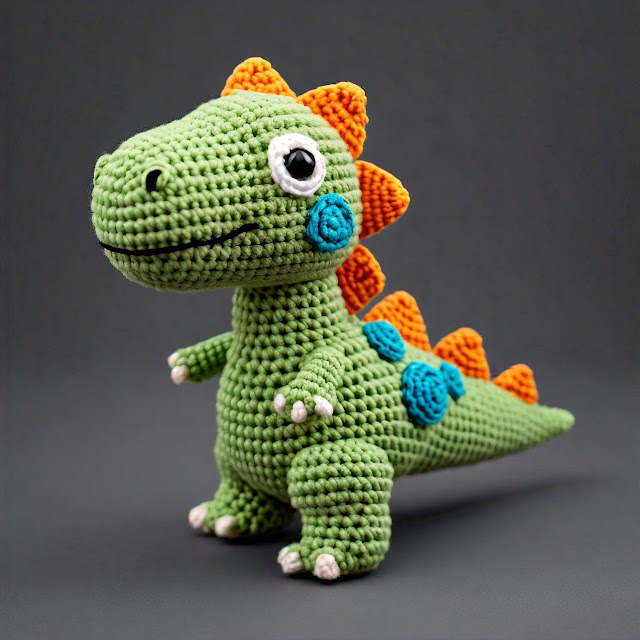
Explore the joy of creating with Free Fluffy Cute Crochet Dino Amigurumi Patterns, which offer a delightful way to craft charming dinosaur toys at no cost. These patterns provide clear, step-by-step instructions to help you make adorable, fluffy dinos perfect for gifts or personal keepsakes. With easy-to-follow guidance, you can transform simple yarn into cuddly, colorful dinos, making each unique and endearing.
Discover the charm of Fluffy Cute Crochet Dino Amigurumi Patterns, perfect for anyone looking to create adorable, cuddly dinosaur toys. These patterns offer a delightful way to bring whimsical dinos to life with ease and enjoyment.
Materials:
Yarn in various colors
Crochet hook
Stuffing
Safety eyes
Yarn needle
Stitch markers
To make these charming Dinosaurs, follow the simple steps outlined in the pattern. Begin by crocheting the body and head, then add legs, arms, and a tail. With detailed instructions and easy-to-follow guidelines, creating these fluffy dino friends is both fun and rewarding. Add personal touches with color variations and embellishments to make each creation unique.
Creating a fluffy and cute crochet Dino Amigurumi is a delightful project combining creativity and craft skills. This step-by-step guide will walk you through making your own adorable dinosaur, ensuring each detail from start to finish is covered. Whether you're an experienced crocheter or a beginner, this pattern will help you make a dino that's both charming and huggable.
Materials Needed:
1. Yarn: Choose a soft, fluffy yarn like a plush yarn or a soft acrylic. For a small dino, you’ll need about 100 grams of yarn.
2. Crochet Hook: Use a hook size that matches your yarn. For most plush yarns, a 3.5mm to 5mm hook works well.
3. Stuffing: Polyester fiber fill or another soft stuffing material.
4. Safety Eyes: 8mm or 12mm, or you can use yarn to create eyes if you prefer.
5. Stitch Marker: To keep track of your rounds.
6. Tapestry Needle: For sewing pieces together and weaving in ends.
7. Scissors: For cutting yarn.
8. Optional: Embroidery thread or yarn for additional features like Nostrils or mouth.
Abbreviations:
ch: chain
sc: single crochet
dc: double crochet
dec: decrease (single crochet 2 together)
st(s): stitch(es)
and: round
Pattern:
Body:
1. Start with the Head:
Rnd 1: Begin with a magic ring and work 6 sc into the ring (6 sts).
Rnd 3: Sc in the next st, inc Around (18 sts).
Rnd 4: Sc in the next 2 sts, inc around (24 sts).
Rnd 5: Sc in the next 3 sts, inc around (30 sts).
Rnd 6-10: Sc in each st around (30 sts) for 5 rounds.
Rnd 11: Sc in the next 3 sts, dec around (24 sts).
Rnd 12: Sc in the next 2 sts, dec around (18 sts).
Rnd 13: Sc in the next st, dec around (12 sts).
Begin stuffing the head Firmly.
2. Work the Body:
Rnd 1: Attach yarn to the bottom of the head. Ch 1, work 6 sc in the same stitch to join (6 sts).
Rnd 3: Sc in the next st, inc around (18 sts).
Rnd 4-8: Sc in each st around (18 sts) for 5 rounds.
Rnd 9: Sc in the next st, dec Around (12 sts).
Rnd 10: Sc in the next 2 sts, dec around (9 sts).
Stuff the body.
Legs (Make 4):
Rnd 3: Sc in the next st, inc around (18 sts).
Rnd 4-6: Sc in each st around (18 sts) for 3 rounds.
Rnd 7: Sc in the next st, dec around (12 sts).
Rnd 8: Sc in the next 2 sts, dec around (9 sts).
Arms (Make 2):
1. Rnd 1: Begin with a magic ring and work 6 sc into the ring (6 sts).
Rnd 3: Sc in the next st, inc around (18 sts).
Rnd 4: Sc in each st around (18 sts).
Rnd 5: Sc in the next st, dec around (12 sts).
Rnd 6: Sc in the next 2 sts, dec around (9 sts).
Stuff lightly.
Rnd 7: Dec around (6 sts).
Tail:
Rnd 3: Sc in the next st, inc around (18 sts).
Rnd 4: Sc in the next 2 sts, inc around (24 sts).
Rnd 5-8: Sc in each st around (24 sts) for 4 rounds.
Rnd 9: Sc in the next 2 sts, dec around (18 sts).
Rnd 10: Sc in the next st, dec around (12 sts).
Assembly:
1. Attach the Head to the Body:
Position the head on top of the body and use a Tapestry needle to sew them together securely.
2. Attach the Legs:
Sew the legs to the Bottom of the body, evenly spaced.
3. Attach the Arms:
Sew the arms to the sides of the body, just below the head.
4. Attach the Tail:
Position the tail at the back of the body and sew it in place.
5. Add Safety Eyes:
Attach the safety eyes to the head. If using yarn, stitch on eyes in Desired locations.
6. Embroider Additional Features:
Use embroidery thread or yarn to add nostrils, a mouth, or other details if desired.
Final Touches:
1. Stuffing:
Ensure that all parts are well-stuffed but not overfilled. The Amigurumi should have a nice, soft, and slightly squishy feel.
2. Weaving in Ends:
Use a tapestry needle to weave in any loose ends from the yarn.
3. Finishing:
Give your dino a final check. Adjust stuffing, and make sure all parts are securely attached.
Congratulations! You’ve completed your fluffy and cute crochet dino Amigurumi. This little dinosaur is perfect for gifts, home decor, or simply as a charming crochet project to enjoy. Feel free to experiment with different colors and yarn types to create your own unique dino variations.
Free Fluffy Cute Crochet Dino Amigurumi Pattern
Welcome to this step-by-step guide for creating an adorable, fluffy crochet Dinosaur amigurumi! This pattern is perfect for crocheters of all levels who want to make a cute and cuddly dinosaur friend. Follow these detailed instructions to craft your own dino!
Materials Needed:
Worsted weight yarn in your chosen colors (main color for the body, secondary color for the spikes)
Crochet hook size G/4.0 mm
Fiberfill stuffing
Yarn needle
Scissors
Safety eyes (12mm)
Stitch marker
Optional: Blush for the cheeks
Abbreviations:
ch: chain
sc: single crochet
dec: decrease (sc 2 together)
st: stitch
sl st: slip stitch
FO: fasten off
R: round
Instructions:
1. Start with the Body
Round 1: Using your main color yarn, make a magic ring and work 6 sc into the ring. (6 sts)
Round 2: Inc in each st around. (12 sts)
Round 3: Sc in the next st, inc in the next st around. (18 sts)
Round 4: Sc in the next 2 sts, inc in the next st around. (24 sts)
Rounds 6-10: Sc in each st around. (30 sts)
Round 11: Sc in the next 3 sts, dec around. (24 sts)
Round 12: Sc in the next 2 sts, dec around. (18 sts)
Round 13: Sc in the next st, dec around. (12 sts)
Round 14: Dec around. (6 sts)
Stuff the body firmly with fiberfill stuffing.
Round 15: Sl st to close the opening. FO and weave in the end.
2. Create the Head
Round 1: Using the same main color, make a magic ring and work 6 sc into the ring. (6 sts)
Round 2: Inc in each st around. (12 sts)
Round 3: Sc in the next st, inc in the next st around. (18 sts)
Round 4: Sc in the next 2 sts, inc in the next st around. (24 sts)
Rounds 5-7: Sc in each st around. (24 sts)
(18 sts)
(12 sts)
Round 10: Dec around. (6 sts)
Stuff the head firmly.
Round 11: Sl st to close the opening. FO and weave in the end.
3. Attach Safety Eyes
Position the safety eyes between Rounds 7 and 8 of the head, approximately 6 stitches apart. Insert the safety eyes and secure them with the backing on the inside of the head.
4. Attach the Head to the Body
Position the head on top of the body and sew it in place using a yarn needle and matching yarn.
5. Make the Legs (Make 2)
Round 1: With the main color yarn, make a magic ring and work 6 sc into the ring. (6 sts)
Round 2: Inc in each st around. (12 sts)
Round 3: Sc in the next st, inc in the next st around. (18 sts)
Rounds 4-5: Sc in each st around. (18 sts)
Round 6: Sc in the next st, dec around. (12 sts)
Round 7: Dec around. (6 sts)
Stuff the legs lightly.
Round 8: Sl st to close the opening. FO and weave in the end.
6. Attach the Legs
Position the legs at the bottom of the body. Sew each leg securely in place with a yarn needle and matching yarn.
7. Create the Arms (Make 2)
(5 sts)
Round 2: Inc in each st around. (10 sts)
Rounds 3-4: Sc in each st around. (10 sts)
Round 5: Sc in the next st, dec around. (7 sts)
Stuff the arms lightly.
Round 6: Sl st to close the opening. FO and weave in the end.
8. Attach the Arms
Position the arms on either side of the body, just below the head. Sew each arm securely in place with a yarn needle and matching yarn.
9. Add Spikes
(6 sts)
Spike 2: Inc in each st Around. (12 sts)
Spike 3: Sc in the next st, inc in the next st around. (18 sts)
Spike 4: Sc in the next 2 sts, inc in the next st Around. (24 sts)
(30 sts)
Round 6: Sc in each st around. (30 sts)
Round 7: Sc in the next 3 sts, dec around. (24 sts)
(18 sts)
(12 sts)
Round 10: Dec around. (6 sts)
Stuff the spike lightly.
Round 11: Sl st to close the opening. FO and weave in the end.
10. Attach Spikes
Attach spikes along the back of the Dinosaur, starting from the top of the head and continuing to the tail. Sew each spike securely in place.
11. Final Touches
If desired, add a touch of blush to the cheeks to give your dino a cute, rosy Appearance.
Review all seams and attachments to ensure everything is secure.
Congratulations! You've completed your fluffy, cute crochet dinosaur amigurumi. Whether you display it proudly or gift it to someone special, this dino is sure to bring smiles and joy. Happy crocheting.


Comments
Post a Comment